 |
| About Alan |
| Tutorials |
| Free files |
| Win9x FAQs |
| E-mail Alan |
| |
| Articles |
| BIV articles |
| Archive |
| Other articles |
| Archive |
| |
Burning CDs from LPs and Tapesby Alan Zisman (c) 2003Part 4: Making the recording |
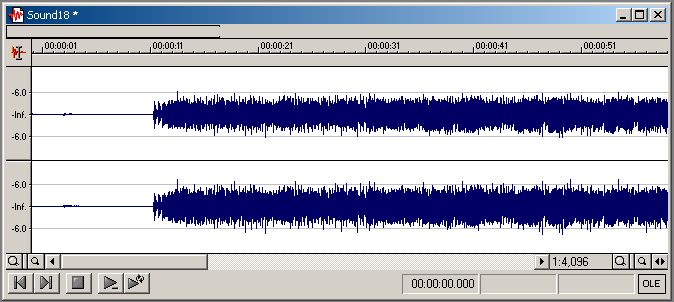
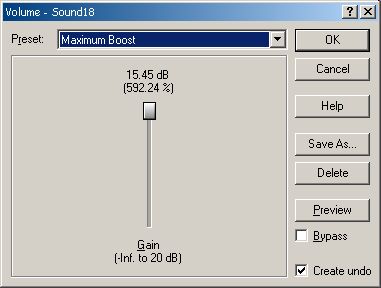
Note: The previous two sections had separate Mac and Windows pages; this time around, I've just produced a single version-- using the Windows SoundForge XP software. You may be using a different program on a Windows system or on a Mac; in that case the specific command-names and dialogue boxes will look different. But there will be enough similarities that hopefully this will prove usable. If you have any questions,, feel free to drop me a line. If you've been following this series of tutorials, you've connected your audio equipment to your computer, set your control panel or system prefence for recording, gotten a better recording application than what came with your computer, and set test levels for a recording. You're ready to go! But before you do, remember to clean the LP and the turntable's stylus, or clean and demagnetize the playback head of your tape deck. Perhaps get a new turntable stylus if you really value the music. What not to do!You may want to press record on your computer software, start up your LP or tape, check your levels, and then go away until you've finished recording one side of the LP or tape (about 20-45 minutes worth of music). After all, you can always cut and paste to individual tracks later. This will work, but it turns out to be a very inefficient use of your time. Your software takes a long time to process large files. Using SoundForge XP 5.0, for example, I recorded a 45minute file containing 18 songs. It took about 6 minutes for the software to process the file when I tried to select and cut out one 3 minute tune, in order to paste it as a new, separate track. As the file got smaller and smaller (as I removed each song individually), it took less and less time-- but there was a lot of time wasted after I had the whole thing recorded.Here's a tip suggested by reader David Bentley of Walnut Creek, CA, USA. He says: " The trick is to start at the end. Then it takes Sound Forge very little time to rework the remaining parts of the file. If you need something from the middle, first delete whatever follows it (or cut & paste that to another file), then cut off the part you want, which is now on the end! If you want, of course you can always use undo to restore the file to what it had been, and this will probably be faster too as it is adding things to the end, and doesn't have to shuffle huge amounts of information forward to eliminate the gap. I think that is what takes all the time." -- Thanks David!... but reader Charles Angelich suggests a further step (along with other useful suggestions that have been implimented in this tutorial). He rightly suggests duplicating the large file, and working on the duplicate. That way, if any mistakes are made, the original recording will still be intact. Instead..Best, in my experience, is to record each track on the LP or tape individually, saving it before going on to record the next track. Once it's saved, you can clean it up later, but get each track recorded and saved individually first. Try something like this: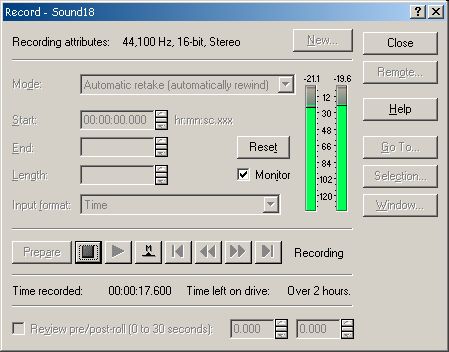 Most of your software will have lots more bells and whistles you can play with, but personally, I'd recommend using as little as possible, to get as clean a recorded sound as you can. Even software that promises to remove pops and scratches when recording old LPs does so by altering the sound of all the music. You may be better off keeping the scratches in the recording. When you've got a set of usable recordings, you're ready to burn them to CD. The software that came with your CD burner will do fine for this, though deluxe commercial versions will again offer more features. For example, Roxio Easy CD Creator Pro or Platinum editions, unlike the Basic version that is often packages with PC CD-burner hardware, includes a SpinDoctor module which includes features to remove clicks, pops, and hisses, and normalize (balance) levels between tracks recorded from different sources. Mac users can get similar SpinDoctor features from Roxio Toast Titanium . These are not (legally) downloadable, but can be purchased online (US$99). Last updated: July 7, 2003 The complete Burning CDs from LPs and Tapes series: Printer-friendly versions: Mac or Windows |
|
|
|
|
| Alan Zisman is a Vancouver educator, writer, and computer specialist. He can be reached at E-mail Alan |