Using Irfanview as a quick Powerpoint replacementby Alan Zisman (c) 2006
Polish translation by 'Best Pillows' The problem: a teacher at my school is holding a meeting for potential parents of next year's kindergarten class. She has about 46 digital photos illustrating a typical day for her students, that she would like to show while she's talking about her program. She has access to a computer on a cart, a screen, and a digital projector, but she has no experience creating a digital slideshow. More and more people want to use a digital projector and a series of digital photos to accompany a spoken presentation... or just run a series of photos with music. A first impulse might be to create a Powerpoint presentation-- Powerpoint has become ubiquitous and seems to be almost as well known as Coca-Cola, or Kleenex, or Xerox. But for many users, Powerpoint may be overkill... if you don't already have a copy, it's expensive, whether purchased on its own or as part of Microsoft Office. And it's time consuming to learn to work with it, and even if you're familiar with Powerpoint, creating a presentation with these 46 digital photos would take a while, as 46 slides would have to be created, one for each photo. (LibreOffice is a free office-suite replacement for Microsoft Office; it can be downloaded from https://www.libreoffice.org/download/download/ and can be recommended for people not wanting to buy a copy of Microsoft Office. But LibreOffice.org's Impress presentation module, while Powerpoint-compatible, is as complex to learn and use as Powerpoint). Irfanview is a very useful free utility for working with digital photos and other computer graphics. It can be downloaded from http://www.irfanview.com. (Note that it is only available in a version for Microsoft Windows). I find it very useful for resizing, cropping, coverting, and other basic graphics functions, but I'm not going to go into them here. A more general tutorial can be found at: http://www.rams-es.eu.dodea.edu/online/Irfanview/IrFanview%20Tutorial/IrfanView%20Tutorial/container.htm (Note that I used Irfanview for helping to make all the images used in this tutorial). While the OpenOffice.org download is a hefty 80 MB or so, Irfanview's install file weighs in under one MB. Many thanks to the Bosnian programmer, Irfan Skiljan for creating and continuing to maintain Irfanview, and for making this useful piece of software freely available). Besides helping my colleague learn to make a slideshow for her parent meeting, I regular use Irfanview's slideshow feature; some examples:
In Irfanview's File menu, there's a Slideshow option. This can be used to create a basic slideshow in a manner of minutes that can be used in a variety of ways. Let's take a look: 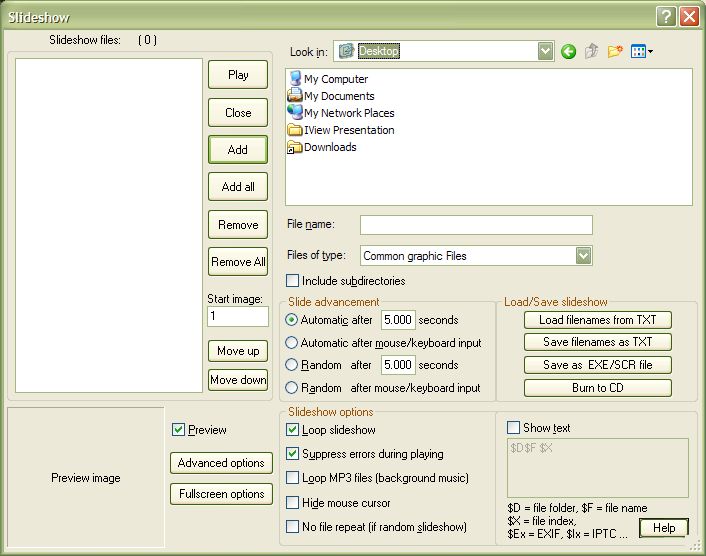 It's quite a busy dialogue box; it won't win any awards for sleek design. But it packs a lot of functionality into a relatively small amount of space. Navigate to a folder full of pictures that you want to use. When you see the file names of your images, you can select individual pictures; when a picture is selected, a preview appears in the lower left corner. 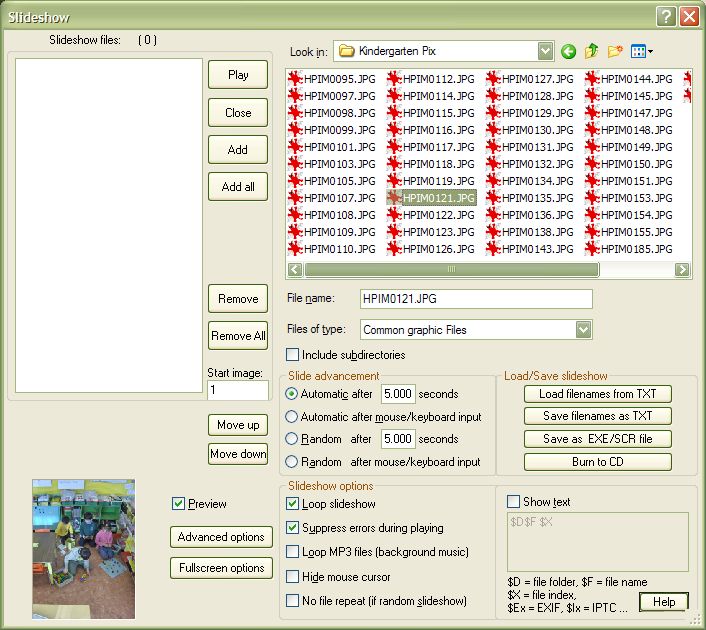 Clicking the Add button lets you add images one at a time; clicking the Add All button lets you add all the photos in the folder. You can navigate to a different folder and add photos from there as well... repeat as needed until all your photos are listed in the space on the left: 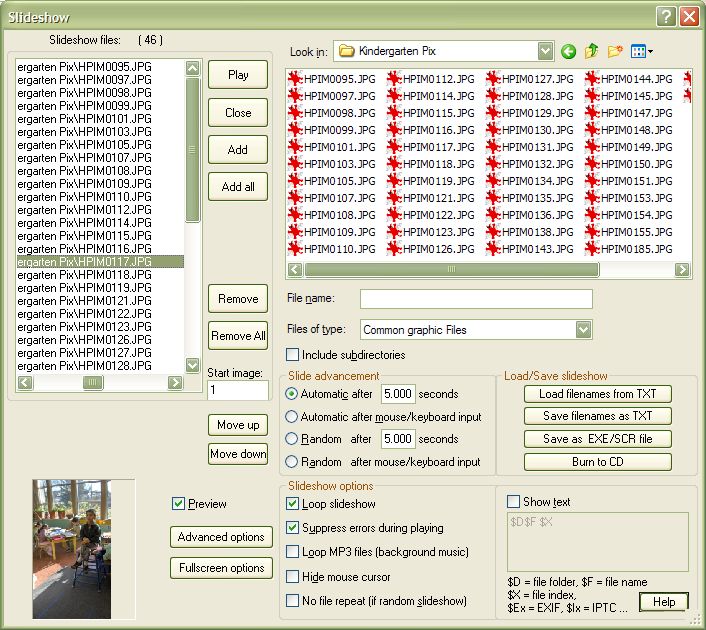 Notice that the image-list on the left includes the full folder path for each photo, making it difficult to see the actual file names, though you can use the scroll-bar along the bottom to make the display more useable. If you click a file-name in that left-hand list, the photo will again be displayed in the Preview window. Ideally, you are happy displaying your images in the order they're listed... if not, you can select an image, and use the Move Up or Move Down buttons to move it to a new place in the list. Repeat as needed until your images are in the order you want. Look at the various options in the lower-right area of the dialogue box. You can set your slides to advance automatically or randomly after a pre-set time-- to get a time longer than 9.999 seconds, you'll need to delete one of the decimal points. That will let you set the time to something like 25.00 seconds. Alternatively (and more usefully for the teacher I mentioned at the beginning), you can set the slides to advance after mouse or keyboard input-- again automatically or randomly. Note that even if you set a time delay, a mouse or key press can still be used to move to the next slide or back to the previous one. (At least if you've saved your slideshow as an EXE file; if saved as an SCR screensaver, any mouse movement or keypress exits the screensaver). Click the right mouse button (or press the Right arrow key) to proceed to the next slide; the left mouse button (or the Left arrow key) goes to the previous slide. You can set your slideshow to loop until stopped (the default); unchecking that option means the slideshow will exit after the last slide. You can also loop background music files, and to ensure that in a randomized slideshow, each image only appears once. Click on the Advanced options button: 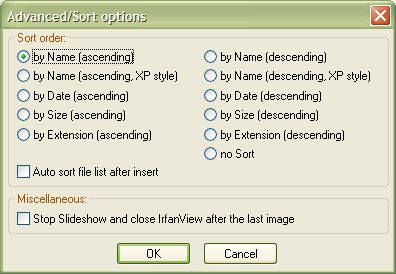 Most of these control how the slides are sorted... if you manually rearranged the images in the list, check and make sure it's set to no Sort. Check the Fullscreen options button:  If you are using images that are smaller than the size of the screen, you may want to choose whether to display them stretched to screen size or at their original size. Either way can cause problems; too small images may not be very effective, but stretched to too large a size, they may appear grainy: pixellated. If you're working with digital photos, these days most are larger than typical screen size, making this less of a problem. The Add Text options do not let you add different text with each image; you can have a standard caption appear throughout the slide show, or show the file name and other similar information for each image using the codes listed. If you choose to use text, you can set the colour, size, and font. (A simpler version of this appears in the main Slideshow dialogue). Aside: In the main Irfanview program, you can add text to images (one at a time)-- to do this, select the area where you want text to appear, then press Control + T... you can enter the text you want. Note the Text is transparent option to overlay text without erasing the background image. 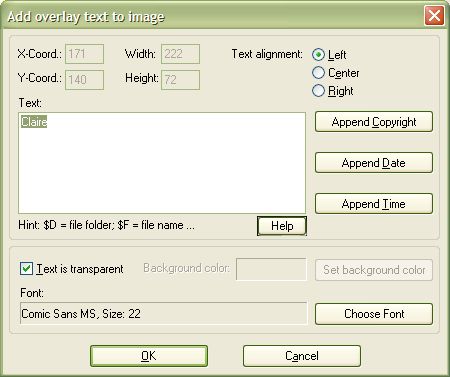 By clicking the Choose Font button, you can change the font used and the font size, style, and colour. Be sure to save your image after adding text. Repeat as needed. When you've got the images listed in the desired order, and the various options in the main Slideshow dialogue and (optionally) the Advanced and Fullscreen dialogues set as desired, click the Save as EXE/SCR file button. 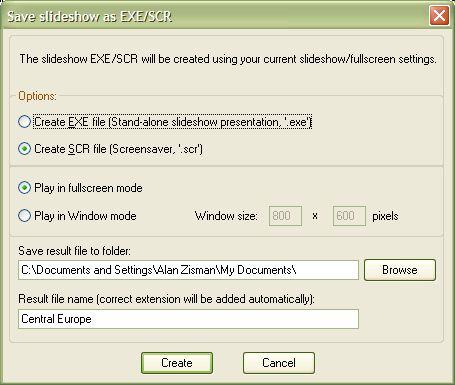 More useful options here. An EXE file runs on its own, while an SCR file can be used as a Windows screen saver (best if copied into the C:\Windows folder). Creating an SCR file can be a handy way to have your vacation photos (or photos of all the students in your classroom) appear automatically whenever your computer is not in use. (Note: double-clicking an SCR file will run it, just as with an EXE file, but clicking the mouse will shut down an SCR screen saver, while it can be used to change the slide in an EXE slideshow presentation). You don't need to have Irfanview installed on a computer in order to use either an EXE or SCR slideshow, by the way. My teacher colleague wants an EXE file so that she can manually move from one slide to the next as she talks to the parents. Most often, we probably want the default fullscreen mode; the Window mode, with a window size smaller than the screen size will let some of the computer background appear behind the slideshow. Finally, you can choose the location for the saved file and a file name. (Note that Irfanview remembers the location and name from the last time you created a slide show). When you're ready, click Create. The computer will be busy for a little while, depending on the computer's power, the size of the photos, etc. On this Pentium 4 (2 GHz), creating a slideshow from the 46 Kindergarten photos took about 6 seconds. With a little practice, you can probably create a usable slideshow from a large bunch of photos in 2 minutes or so, assuming you don't need to do much fiddling with slide order. Note that these files can be large: the folder with the 46 kindergarten photos took up 29 MB of space. Similarly, the slideshow that Irfanview created from those photos took up pretty much the same 29 MB. Adding music You can have background music in your Irfanview-created slideshow... to do this, add an MP3 music track before the slide where you want it to start playing in the list of images. It will (by default) loop until another MP3 file is encountered, at which point the next music file will start playing. (If there's only one MP3 file listed as the first file in the list, it will continue playing throughout the slideshow, though if the slideshow is set to repeat, the song will start over from the beginning each time the slideshow goes back to slide #1). Note: by default, the slideshow dialogue only shows 'common graphic files'... you have to change it to show 'All Files' . In order to work with MP3 files in this way, you should have the Irfanview plugins (available from http://www.irfanview.com) installed. Nicely, you don't need either the Irfanview or the plugins installed in order to play the musical slideshow on another computer. That's about it... what you don't get that you could do (with more work) in Powerpoint or OpenOffice.org's Impress:
|
|
|
|
|
| Alan Zisman is a Vancouver educator, writer, and computer specialist. He can be reached at E-mail Alan |