Creating presentations using OpenOffice's Impressby Alan Zisman (c) 2006
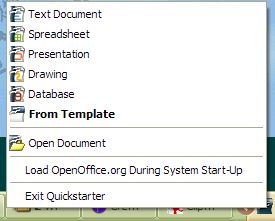
Urdu translation by Samuel Badree on MobileMall Digital presentations have become increasingly popular over the past decade, spurred on by Microsoft's bundling of its PowerPoint presentation software with its Microsoft Office software suite. They have moved from sales pitches and corporate year-end reports to university students and on down to high school and now accompany even upper-elementary school student oral reports. Microsoft's PowerPoint has name recognition, but it's not the only software in this product category. Like Kleenex or Xerox, it has become almost a generic name. And it has become a bit of a cliche, with too many presentations using the same generic PowerPoint templates while a speaker drones on and on. It has been stereotyped as 'PowerPointlessness'. For this tutorial, we're going to walk through the process of creating an enhancing a presentation using a different, PowerPoint-like piece of software: Impress, which is part of the OpenOffice.org software suite. OpenOffice.org, like Microsoft Office, includes a word processor and spreadsheet in addition to presentation software. Each of its components can open and save in the corresponding Microsoft Office file format. Unlike PowerPoint, OpenOffice.org is available for free-- the latest version for Windows or Linux can be downloaded from www.openoffice.org, and NeoOffice for Mac OS X can be found at: www.planamesa.com. (Click for my tutorial on customizing your OpenOffice.org installation so that, among other things, it will save in Microsoft Office formats by default). Note: OpenOffice.org is essentially the same program as Sun's StarOffice suite, which is also being distributed as part of Google's Google Pack- regardless of what your version is called, these instructions should work. Before you get started Plan ahead. Think about the purpose of your presentation and your audience. Are you wanting to create a standalone photo display that is intended to run unaccompanied? A report combining text and images (and optionally sound or video) to accompany an oral report or discussion? Do you already have the images (and optional music and video clips) that you need? Think about your text. Your presentation should not be too text-heavy. Text in a presentation should present an outline of what you're planning to say-- not actual paragraphs of content. Like an outline, it shows the main points- a summary. In fact, you may want to write out an outline before you begin entering anything into your presentation-- though there's also an outline mode in your presentation software. Alternatively, I encourage users to prepare a list of questions; each question (and an outline of the answer) can easily become a slide in the presentation. Getting started If you've got OpenOffice.org 2.x installed onto a computer running Windows, there are two ways to start a new presentation. The default installation puts a folder into the Start Menu labelled OpenOffice.org 2.0, with icons inside it with the names of the various components. Click on the one named OpenOffice.org Impress to start a new presentation.
Either way, you'll see a series of dialogue boxes to get you started with a new presentation. Let's look at each one. 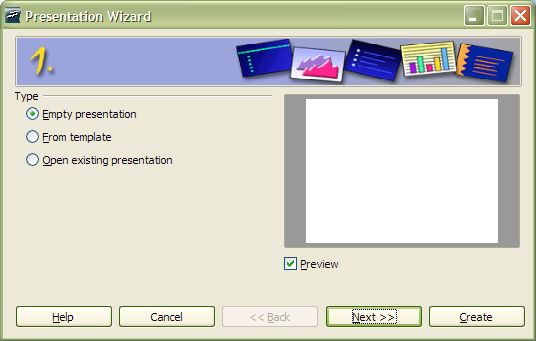 You start with three choices; I generally recommend choosing an empty presentation. Impress has few pre-made templates compared to Microsoft PowerPoint, and templates become cliched very quickly. Of course, if you want, you can open an existing presentation. If you click on the From template option, the dialogue box mutates to show you Impress's paltry selection of templates, with pictures of each appearing in the Preview area. 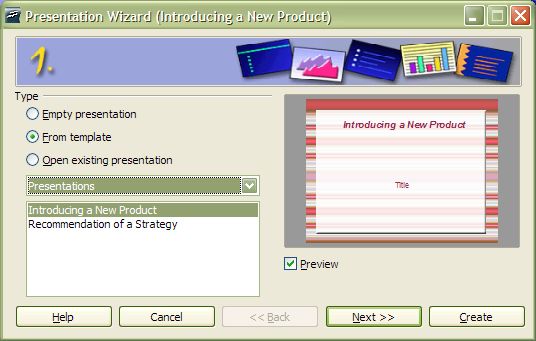 Note that if you start with an 'empty presentation' you can always change your mind and apply a template later. I'm going to continue as if you chose an empty presentation, and click Next. 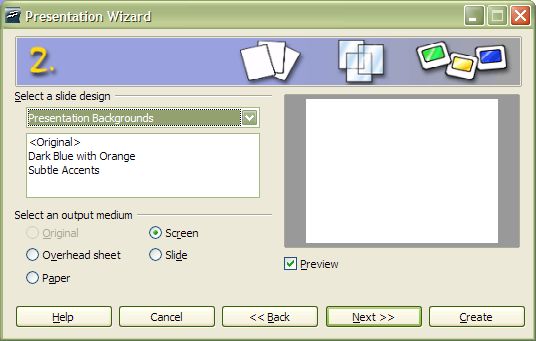 Choosing a slide design again gives you a paltry selection of pre-made designs; if you choose one (of two) it is applied to all slides. Again, I'm going to leave things empty and click Next. (Note that you can skip all these preliminary stages by clicking Create at any time). 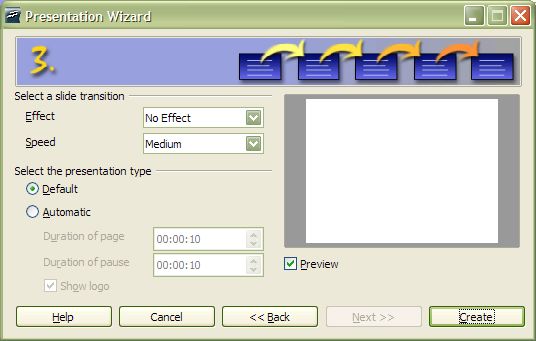 Slide transitions are, perhaps, more interesting... transitions appear when you move from one slide to another, letting the next slide fade in or appear from the top-left corner on down. Any transition you choose now will be applied to all slides; again, you can ignore this now and add transitions later, which also lets you apply a different transition effect to each slide if desired. You can preview each of a long list of transitions in the preview window by clicking the little arrow next to the words currently reading: No Effect. (Note that on older, slower computers, transitions that appear smooth in the preview window may in fact be slow and unbearable displayed on the full screen). Another choice here: the default presentation type requires a mouse click (or pressing Enter or the right-arrow key) to move to the next slide. If you want a kiosk-type presentation where slides change on their own, select Automatic then set the duration for each page. When you've made your choices, click Create. Add your content OpenOffice.org 2.0's Impress module has an improved interface from the earlier version 1.x (which, as I write, is still used in the Mac NeoOffice release version): 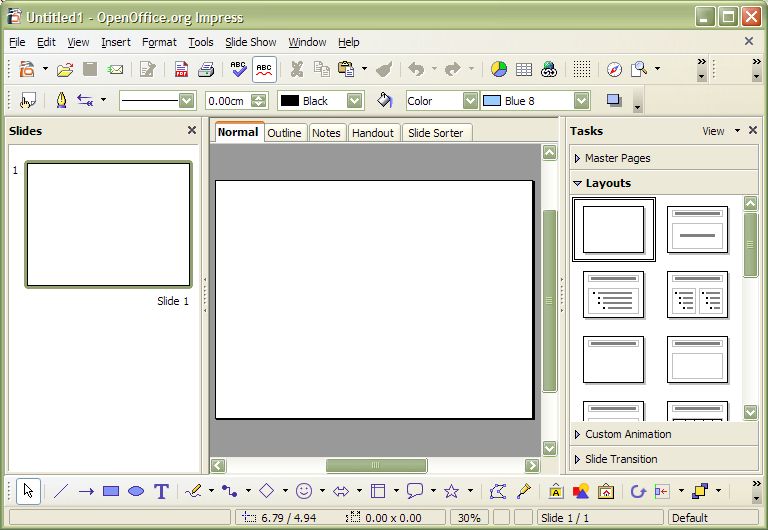 The
interface has three main areas: On the left, there are small versions
of each slide, currently with only one slide appearing. When there are
multiple slides, you can scroll up and down, and select an individual
slide. The centre section has a larger view of the currently-selected
slide, allowing you to add text, images, etc. Notice that along the top
of this section are tabs, allowing you to switch from this Normal view
to Outline view, a view of your handouts, notes, etc.
On the right, you'll see a variety of pre-made slide layouts. In this section, you can also see options for Master Pages (the same slim selection we passed up on when we were getting started), Custom Animations (more on that later), and (again) Slide Transitions. Let's start by moving our mouse over to the right-hand slide layout in the top row (in that right, Layouts panel). Notice that if you let your mouse cursor point there for a moment, a label: Title Slide pops up. Click it and see how the slide in the centre section changes and now has the Title Slide design, complete with hints: Click to Add Title and Click to Add Text. (These hints, along with the grey lines outlining the different areas don't appear in the actual presentation or if you print your file). Feel free to give your publication a title, and add your name, date, etc. in the lower section. Don't worry about background colour, pictures, etc for now. Workflow There are two main ways to create a presentation. Some people prefer to type right into slides, as they appear in the Normal view pictured above, creating new slides as needed. An alternative is to work in Outline view, by clicking on the second, Outline tab. When you do that, you simply type an outline, and the software creates new generic slides everytime you make a new main heading by pressing Enter. When you press Enter to move to a new line, a new slide is created... instead, press Tab to change it to an indented sub-heading. Pressing Tab again, indents further. If you've indented too far, hold the Shift key down while you press Tab to move one level back to the left. After you've added all your text, you can move back to Normal view, change the slide layouts and add graphics, etc. Instead, we're going to type right into slides in the Normal view. When you need to add a new slide, either click on the Insert menu and choose Slide or right-click in an empty piece of the left-hand Slides panel and pick New Slide from the popup menu: 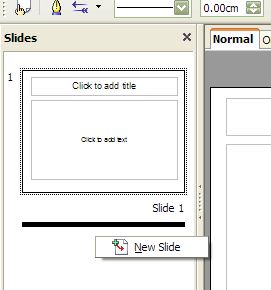 Notice how the new slide is also formatted as a title slide (since that's what you picked last)... look over the various sample formats in the Layouts section on the right. You can use the scrollbar for that section to see additional layouts. Perhaps most popular are the ones with a title and two columns, one for text, and one (with a picture of a house) for an image. There are versions with the image on the left or with the image on the right. Note that there are similar-looking layouts with the picture of the house replaced with a bar-graph. Unless you are planning to add a graph from data contained in a spreadsheet, you don't want one of those! 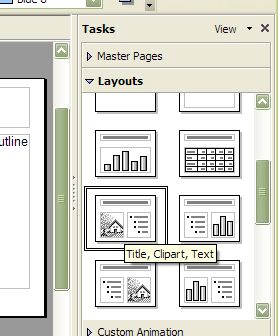 Notice also that the layout suggests that any text you add in the text frame will appear bulleted. You can turn this off, but it's a reminder that your text is an outline-- in point form. Choose the slide design with the little house on the left. Type in a title and some bullet points of text. Notice that you can type too much text to fit on the slide. If that happens, you could select your text and set it to a smaller size... but better might be to limit the amount of text on that slide and add it to another slide-- your audience can't digest too much text at one time. 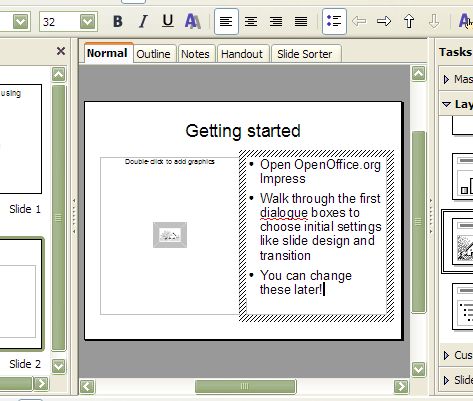 Note the little picture of the house on the left, along with the hint: "Double-click to add graphics". Do it. You'll be prompted to choose a piece of clipart from OpenOffice's default clipart folder: Gallery. You can navigate to another location to find the picture of your choice. Very handy: at the bottom of the dialogue box, there's a check box (currently unchecked) labelled [ ] Preview. You may want to check it-- this will let you see what a graphic looks like before inserting it into your presentation. Notice that when you insert a picture this way, it is automatically resized to fit in the available space. Once the picture is inserted onto the slide, you can click on it to select it. With it selected, you can move it around the slide with your mouse, resize it (by dragging one of the little green boxes along the sides), or delete it by pressing the Delete key. 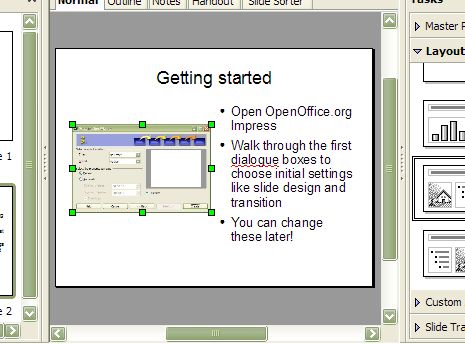 Delete the picture you just inserted... notice that there's no obvious way to add a different picture. Here's what you can do (and you do this to add a picture on your title slide or anywhere else): Click on the Insert menu. Choose Picture and then From File. This time, the dialogue box will go to the same folder where you found the first picture. Pick the same picture or another one. Notice that this time, the picture is not automatically placed or sized... move your picture and resize it as needed. 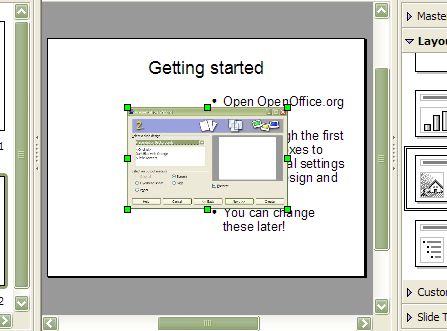 Using the Insert/Picture/From File menu item lets you add multiple pictures onto one slide and make any arrangement you like. Insert additional slides, adding text and images as needed. Workflow There is a lot of 'eye candy' in presentation software... you can spend huge amounts of time fiddling with fonts, sizes, animations, transitions, backgrounds, and more. My suggestions:
Assuming you've created all your slides and added your text and images, you may decide that you want something other than a plain white background. To change the background on one (or more) slides, select a slide from the Slides list on the left. Then click on the Format menu, then choose Page and finally, click on the Background tab. You'll get an empty-seeming dialogue box because your Fill is currently set to None. Click on the little arrow beside the word None, and you'll see several choices: Color, Gradient, Hatching, and Bitmap. Clicking Color lets you choose from a drop-down list of solid colors or shades. Gradient gives a range of choices of 'gradient fills', which are smooth blends from one colour to another. Hatching is (in my opinion) a set of boring cross-hatch patterns. Bitmap lets you choose from a range of pre-made pictures: sky, water, marble, rocks, bricks, leaves, etc. Each will be previewed if you select it. I've picked Brownstone and clicked OK. 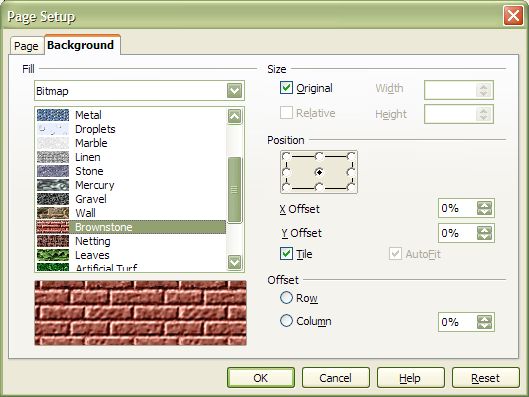 When I do that, a small dialogue box pops up asking "Background settings for all pages?" Clicking Yes applies that background to all your slides, clicking No applies it to the selected slide (or slides) only. It looks like my text is now difficult to read. To be sure, run your presentation to see how it looks at 'real' size. Two ways to do this:
Yes, my text is now unreadable. I could pick a different background, or I can try to change my text to a different colour. To do this, I need to go through my slides, one at a time, and select the text in each separate section. With the text in one section selected, click on the Format menu and choose Character and then go to the Font Effects tab. The Font Color item let me pick bright yellow, which is much more visible against that background. Repeat as needed. 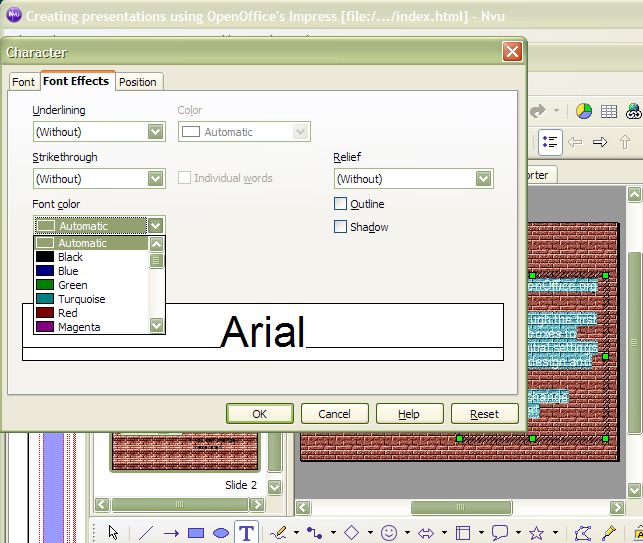 Setting transitions While you might have set a default transition when first creating your presentation file, you can set or change the transition at any time-- for one (or more) slides or for all the slides in your presentation. To do this, look near the bottom of the right-hand panel, for the a label: > Slide Transition . Note the little arrow to the left of the words. The arrow pointing to the left indicates that this section is closed, while the Layouts section is opened. Clicking on the arrow or the words Slide Transition opens that section (and closes the Layouts section). Alternatively, click the Slide Show menu and selecting Slide Transition.
Be careful with animations All the hesitations I have about transitions apply doubly to animations. While transitions are effects that apply to the whole slide when it first appears, animations are special effects applied to individual blocks of text (even to single letters) or to graphics, after the slide has appeared. I'm not going to go into detail about animations; you can access these features by selecting the Custom Animation option in the right-hand panel (or by clicking the Slide Show menu and selecting Custom Animation). If you think you want to use this feature, experiment! Turning your presentation into a web page OpenOffice.org does a good job of turning a presentation into a series of web pages. Unlike the similar feature in Microsoft's PowerPoint, it does not require the use of Microsoft's Internet Explorer browser. However, note that when you make a website out of your presentation, you lose special effects such as transitions and animations. Moreover, OO.o makes two sets of pages-- one set is a series of pictures of your slides. Any web links in your text will no longer work in the picture of the text. OO.o also makes a set of text-only webpages... these don't have any pictures, but any web links will work. To make your presentation into a website, first make sure your presentation is in a form you're happy with. Make sure you have no spelling mistakes (etc), and save your presentation. Then click the File menu, and select Export. You'll be prompted for a location (on your hard drive) for your exported website, and for a file-name for the first slide. I'd suggest you change the name of the file to index.html. Click Save. Click Next, then on the next screen, remove the checkmarks from Create Title Page and from Show Notes. 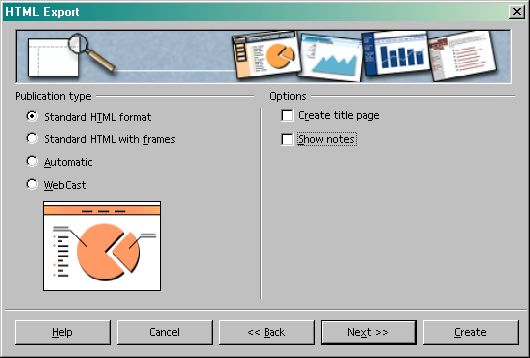 Click Next. You'll be asked to select a screen resolution and optionally an quality for the exported images. If you used sounds as each slide loaded, you can choose to include them: 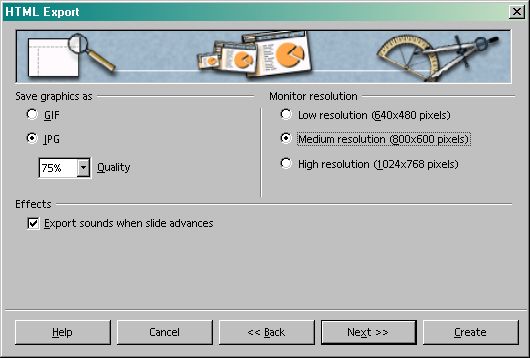 I would recommend that you experiment with either 640x480 or 800x600 resolutions. People with monitors set to low resolutions will have problems viewing your page if you choose High (1024x768) resolution. You may want to raise the saved graphics quality from the default 75% to a higher figure. Click Next. You'll be prompted to pick a set of control buttons for your webpages: 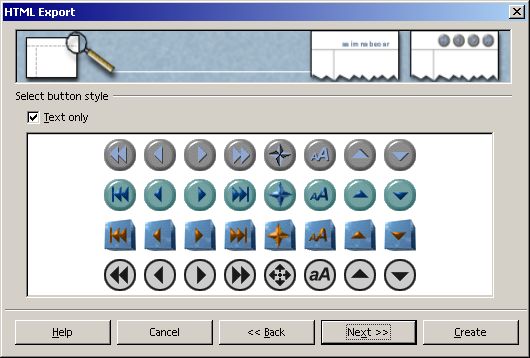 Click Next... leave the option to [x] Apply color scheme from document set (which will do a good job matching the web page background to the the colours in your slides). Click Create. You'll be prompted to name and save your HTML design. Click Do Not Save. In a moment, your website should be created in the location you selected. Go there and you'll see a large number of files; go down the list of files until you see Index.html. This will open your site's start page. Now it's up to you to upload the contents of that folder onto the Internet. Printing You may want to print your publication with one slide per sheet of paper-- this is especially handy if you want to use Impress to make a set of acetates to use with an overhead projector. (Not a bad idea given how often computers crash or users are unable to make them work with an unfamiliar digital projector). Also useful is to print out a set of handouts-- with scaled-down versions of multiple slides per sheet of paper. To do that, start with the File menu and select Print... but don't rush to click the OK button. Instead, click the Options button: 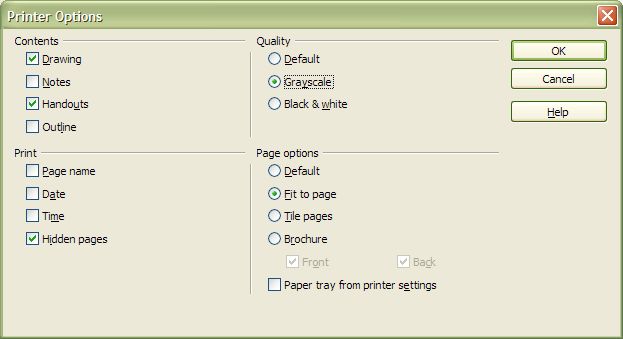 I've checked the Handouts option which will print 6 slides per page-- I need to remember to uncheck the Drawing option, which would also print full-page versions of each slide. I changed the print quality to Grayscale (I could also have tried Black & White) since I'm going to ultimately be photocopying handouts. And I chose to Fit to Page. You may want to experiment... in some cases, you may need to reset your backgrounds to white before printing, for instance. If you like, you can make these default print options... see my tutorial on setting OpenOffice.org options. November 2011: Reader Dr. Martin Firth wondered: "I have spent two days trying to fathom how I can make lines of text on an ODP slide appear one after the other at a mouse click. I am sure I have done this in the past, though on Powerpoint, - even to the point of making previous lines fade slightly to give prominence to the new line of text being displayed." After a little bit of experimentation I replied: "I'm attaching a little (one slide) presentation (right click on the link to download to your computer) I just threw together... it should open showing just the title - each successive click displays a line of text. To create it, I made the slide, including all the lines of text. I selected the first line, and open the Custom Animation section in the Task Pane (on the right)... and clicked Add. I picked the Appear effect from the Entrance list and clicked OK - making sure that the effect was set to occur On Click. Then I selected the second line, and did the same thing, then the third line, then the fourth. I think that does what you want! For more on slide animation effects, you might want to check: http://wiki.services.openoffice.org/wiki/Documentation/OOo3_User_Guides/Impress_Guide/Using_slide_animation_effects" |
||||||
|
|
||||||
|
|
||||||
| Alan Zisman is a Vancouver educator, writer, and computer specialist. He can be reached at E-mail Alan |