 |
| About Alan |
| Tutorials |
| Free files |
| Win9x FAQs |
| E-mail Alan |
| |
| Articles |
| BIV articles |
| Archive |
| Other articles |
| Archive |
| |
 |
|
|
||||||||||||||
|
Parallels
Revisited: release version far more polished than beta
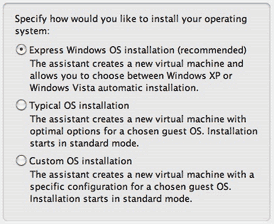
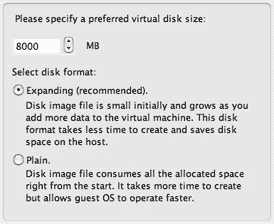
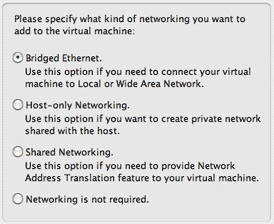
by Alan Zisman (c) 2006 First published in Low End Mac November 21 2006 Mac2Windows column Last April, I wrote about Parallels Workstation (see Running Windows in Parallel on Your Intel Mac). This application, then still in beta, was the first software to let the then-new Intel-powered Mac models run other PC operating systems, including Windows, Linux, and more, in a virtual session running as a program on top of OS X. While Apple had released Boot Camp (also in beta) at about the same time, Boot Camp, requires a reboot, as the name suggests. While devoting the full resources of the computer to the PC operating system, this can be more time consuming and less convenient for a user who wants to continue working with his or her Mac applications while running a single PC application. Moreover, Boot Camp only works (at least officially) with Windows XP Service Pack 2 (it's expected that the version of Boot Camp to be included with Apple's upcoming Mac OS X 10.5 "Leopard" will also support Windows Vista), while even Parallels Workstation - in beta - worked with a wide range of PC operating system, including the full gamut of Windows versions, a range of Linux distributions, and more. Still, the prerelease version of Parallels Workstation that I tested back in April was a work in progress. In particular, USB support simply wasn't there. I couldn't, for instance, print to the USB printer attached to the Mac. Back then, I was testing both Boot Camp and Parallels Workstation betas on an Intel iMac loaned to me by Apple Canada; after a few weeks, I had to send the Mac back to Apple. Recently, I bought my own, a new Core2 Duo iMac. I upgraded the hard drive to 250 GB and the RAM to 2 GB so I would have lots of resources available to play with multiple operating systems. Emulation vs. Virtualization "Hold on," I hear some of you thinking. "This is nothing new. People have run Windows on Macs far longer than Macs have been available with Intel CPUs." And you're absolutely correct. I've written in this column about emulation software such as Microsoft (originally Connectix) VirtualPC and Lismore System's Guest PC. Both of these (and other) products allow owners of PowerPC Macs to run Windows and other PC operating systems as programs on top of Mac OS X - but there's a huge penalty. PowerPC-family and i386-family processors are unrelated, and at a basic-level they "speak different languages". As a result, software to run PC operating systems on a PowerPC Mac need to emulate an i386-type processor, translating each instruction from the PC operating system into an instruction that the PowerPC can understand. Like trying to read a Czech newspaper with a Czech-English dictionary at hand, all that translation slows things down a lot. It's workable, but it's noticeably slower than even a low-end i386 PC. Current Macs, however, are all built using Intel processors. In fact, they are identical to the processors used by other manufacturers to built Windows PCs. Current Intel (and competitor AMD) processors all support virtualization, the ability to set aside a block of memory for a "pretend" (or "virtual") computer. Since this virtual session is passing on instructions from an operating system designed for Intel processors to a real Intel processor, no low-level translation is necessary. The result is near-native performance. Back in Parallels The release version of Parallels Workstation is available as a 30 MB downloadable 15-day trial version from www.parallels.com; to use it, you'll need to register with Parallels to receive an activation key. Using it beyond 15 days requires purchasing a license; when first released, Parallels was priced at US$49 (and was available for preorder prior to release for US$39); the cost has gone up to US$79.99. This does not include the cost of purchasing any Windows operating system that you might choose to install. Installation is quick and straightforward, assuming, of course, a valid activation key Once installed, the next step is to create a virtual session and install a PC operating system. The release version of Parallels is a lot slicker at this than the beta that I looked at in April. Important note: I worked with the downloaded version of Parallels Workstation and had no problems; a friend, however, also bought a new Core 2 Duo Mac. Along with it, he bought a boxed retail edition of Parallels. It installed fine, but trying to actually start a virtual session repeatedly forced a restart of his Mac. Downloading the latest updated copy of Parallels solved that problem- there's a menu option to check for updates. Be sure to use it! Easier Installation
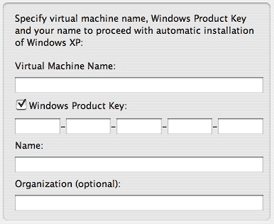
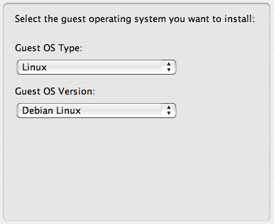
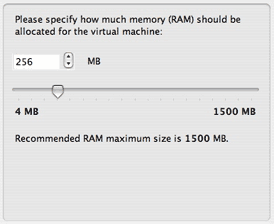
No matter which OS installation option you select, you get to sit through your chosen operating system's installation process. While purchasers of Virtual PC could (optionally) purchase an image file with a preinstalled Windows (or, for a short time, Red Hat Linux) drive image, with Parallels, you've got to provide your own operating system installation CD (or image file of an installation CD) and patiently sit through the OS installation. I installed Windows XP Professional, Windows Vista RC2, and Ubuntu Linux 6.10. Each installed without problem. 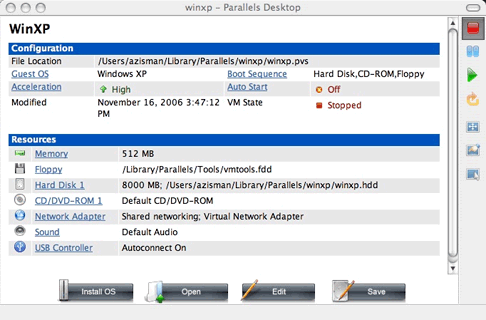 Life after Installation After installing the operating system(s) of your choice, Parallels provides an information window for each virtual system. Clicking the green "play" icon starts up the virtual computer. Clicking on a setting brings up the Configuration Editor, letting you change that (or other) settings. As with a real PC, there may be times when you may want to change the boot options, perhaps to boot to a CD rather than from a hard drive. Unlike a real PC, you can increase the amount of RAM available to these virtual computers without having to open up anything (assuming you have enough RAM installed on your Mac, of course - remember, you need enough RAM to allow both Mac OS X and your virtual PC operating system(s) to run at the same time). Another perhaps useful option: You can set the (virtual) USB Controller to "Autoconnect" to any USB device connected to your Mac, or allow yourself to manually tell the virtual PC about individual connected USB devices like printers. (Parallels virtual systems are unaware of connected FireWire devices.) With autoconnect turned off, I needed to manually click on Parallels' Devices menu to tell Windows about my USB printer - when I did that, it correctly detected that the Canon i860 printer within a few seconds. As a test, while running a virtual Windows XP with USB Autoconnect on, I installed the Windows software that came with a new Palm Tungsten PDA; after installing the software, the installer instructed me to plug in the Palm. It was immediately identified, and synched up with the virtual PC without problem. As far as I can tell, USB support just works. Startup is pretty brisk - it took 35 seconds from clicking the green Go button until I had a fully booted and usable Windows XP desktop on my 2.0 GHz iMac. Also Nice... After you install a Windows OS version, click the Parallels VM menu and select Install Parallels Tools. This points Windows to a CD image file, telling it that it's a CD that had been inserted, and autostarting the installation program. This lets you choose to install new drivers for mouse, network, video, Parallels Shared Folders, and more. My advice- install them all. The new mouse driver automatically changes your mouse from a Windows mouse when you're hovering over the Windows window (!) and back to a Mac mouse when it's pointing anywhere else on your desktop. Without this driver, you have to press the Control + Option keys to give the mouse cursor back to your Mac. The new video driver allows Win2000 and NT to do better than 640 x 480 16 colour graphics; while Windows XP doesn't need that support, the improved mouse driver requires the new video driver. A sound driver is included for Windows versions prior to XP, which don't include native support for the emulated AC97 sound hardware. A time synchronization tool allows your PC to synch its clock to the Mac's clock, while a clipboard synchronization tool lets you use the Windows and Mac clipboards to share data between these operating systems. Very useful is Parallels Shared Folders, also added in the Parallels Tools installation. This lets you set folders on your Mac as shared (prior to the OS startup); a Parallels Shared Folders icon on the Windows desktop provides easy access to those folders and allows you to map a drive letter to any of your shared Mac folders. This gives your Windows session access to music, photos, or any other documents saved on your Mac. While these tools work fine with Windows operating systems, Linux users just get a driver for the emulated network card. There's no easy access to shared folders (though if you turn on Windows Sharing on the Mac, you may be able to see those folders across your network), and no automatic sharing of the mouse cursor between the Mac and virtualized Linux PC. Also nice: Rather than shutting down a virtual session, you can choose to suspend it; this saves the session to your hard drive, creating a file the size of your installed RAM setting. This can be restarted reasonably quickly, putting you back where your virtual session left off. Even with the Parallels Tools video driver, the virtualized systems are not gaming powerhouses; users wanting to run Windows games may find themselves getting better performance using Apple's Boot Camp to create a dedicated Windows XP installation that has full access to all of their Mac's RAM and direct access to the Mac's video hardware. In Conclusion The beta version of Parallels Workstation that I looked at last spring was a proof of concept - it showed that it was possible to run Windows and other PC operating systems with good performance within OS X on an Intel-powered Mac. The release version is much improved; it makes installation of PC operating systems easier, offers better performance, and includes good USB support. The Parallels Tools make the various Windows versions work better and integrate them with the Mac; I wish the various integration tools were available for Linux installations as well. Not all potential users will be happy with Parallels' US$80 price; Microsoft's Virtual PC for Windows is now free, as are VMWare's Player and Server versions. None of these free products are available for the Mac, however. Still, many owners of Intel-powered Macs will find it worthwhile to purchase a copy of Parallels Workstation, particularly if they need access some of the time to a particular Windows application or piece of hardware. |
||||||||||||||
|
|
||||||||||||||
|
|
||||||||||||||
| Alan Zisman is a Vancouver educator, writer, and computer specialist. He can be reached at E-mail Alan |
||||||||||||||