Setting up ‘standalone’ Rosetta Stone to save student data across a networkIntroduction: Second-language software Rosetta Stone can be run in several configurations. One way is completely stand-along; the software is installed onto a single computer workstation, student records are stored on that workstation, and the program’s lessons are run from a CD disc on that workstation. A second way is networked; a special network version of the software is required; all the lesson files and student records are stored on a network server, and a minimal amount of program files are installed on each workstation. The third way is a sort of hybrid. Program files are installed on each workstation, lessons are run from CD on each workstation. Student records and lesson plans, however, are stored on a network server. This has both advantages and disadvantages. By running the lessons from CD, network bandwidth is minimized and performance is maximized. Because lesson plans and student records are centralized on a server, students can continue their work from any workstation anywhere in the school, sometimes working in their classroom, other times in a library or computer lab, for instance. And because demands on the server are minimal, the Rosetta Stone server can be relatively low-powered and can even be running something like Windows 98 rather than a specialized (and expensive) server operating system. However, like the stand-alone setup, this requires managing a set of CD discs, as students cannot run the software in this configuration without a copy of the CD. Requirements: A computer needs to be set up as a server. As explained above, this doesn’t need to be a high-powered piece of hardware running specialized server software; Windows 98 (and later) includes options for peer-to-peer file serving. Note that this system (though not the workstations) needs a dedicated IP address. Often, systems are set up with what is referred to as DHCP, which automatically gets a network (IP) address from a central server- because this address can change each time the system boots up, DHCP will cause problems on a Rosetta Stone server. As well, you’ll need copies of the stand-alone versions of the Rosetta Stone Student Management System CD (for installation on the ‘server’) and Application CD (for installation on each potential workstation), along with an appropriate number of copies of the lesson CD discs. On the server: insert the Student Management System disc. It does not start up automatically; run Setup.exe from that disc. After a few screens, it will offer a choice of installations: 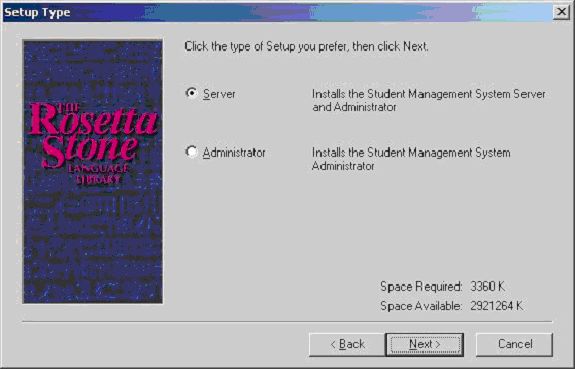
Choose the Server option. (You can install the Administrator option on another workstation to manage students and lesson plans from a computer on the teacher’s desk, if you wish). After the installation completes, it will start up the database and show you: 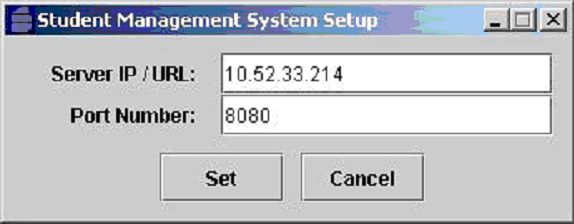 Make note of these settings—you’ll need them on each workstation! On the workstations: Insert the Application CD-ROM disc and run Setup.exe. Afterwards, look in your Start Menu, into The Rosetta Stone program group for the Rosetta Stone Classroom Edition Configuration icon. You want to set it up to match the settings on the server: 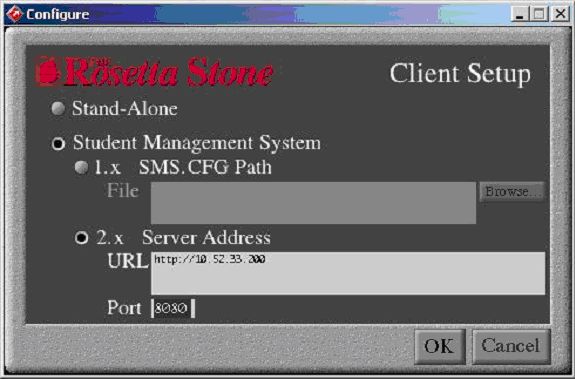
Now it’s ready to look on the server for student records and lesson plans… of course, you still need to set these up! |
|
|
|
|
| Alan Zisman is a Vancouver educator, writer, and computer specialist. He can be reached at E-mail Alan |