 |
| About Alan |
| Tutorials |
| Free files |
| Win9x FAQs |
| E-mail Alan |
| |
| Articles |
| BIV articles |
| Archive |
| Other articles |
| Archive |
| |
 |
|
|
Leopard
Makes It Easy to Share Your Mac's Screen Locally and Over the Internet
by Alan Zisman (c) 2008 First published in Low End Mac June 30, 2008: ZisMac column The ability to view and optionally control the screen of a remote computer can be very handy in a number of scenarios. Maybe you have a parent living in another city with questions about their computer or problems. Trying to help someone over the phone can be problematic, if when you say "Open the Finder" they reply, "What's the Finder"? It's much easier to open a window to their Mac, open the Finder, and show them what you mean. Or I'm at work, sitting at a Windows XP computer, and realize I really need to read a file that's sitting on the hard drive of the iMac on my desk at home. Again, it could be very convenient to have the power to open a window to my home Mac from work. One of Leopard's improved features that's easy to miss is screen sharing; Mac OS X 10.4 had a built-in screen-sharing host, built on the open source VNC protocol, but failed to include a VNC client. As a result, users could use the Networking system preference to turn on screen sharing but couldn't remotely access their shared screen without getting a third party utility, like the free Chicken of the VNC. Leopard adds the missing link - in fact, they include two different ways to connect to a shared screen; each has its advantages, but neither is immediately apparent. Turn on screen sharing In order to connect to a remote Mac, screen sharing first needs to be enabled on that Mac. That's done in the Sharing system preference: 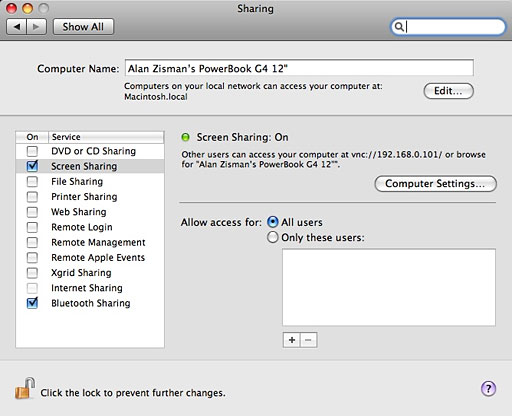 Note that it's easy to turn screen sharing on; when you do that, you're told how to connect to your Mac . . . take note - but also note that this information may not be universally usable. For instance, you can only use the information in the screen shot to connect to my 12" PowerBook if you happen to be connected to my local network - which none of you are. You can optionally control who is able to make use of this screen sharing. There's an optional Computer Settings button; clicking it gives the following options:  Not Very Remote: Connecting Across a Local Network I've got two Macs at home; I've enabled screen sharing on both. So I can sit with my PowerBook on my lap and open a window to the iMac in my home office, enabling me to run applications (like Quicken) that are only on the iMac. To do that from the PowerBook, I click on the Finder's Go menu and choose Connect to Server, the last item on the menu. Just as it said in the Sharing system preference pane, I type in vnc:// followed by the IP address of that Mac. 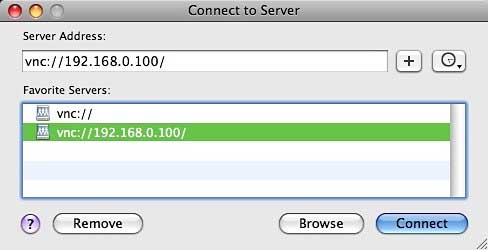 (If you're going to do that more than once, you may want to click on the [+] button to add that address to the favourites list in the bottom half of the dialogue box.) Click Connect, and pretty quickly a window to the remote Mac opens up. My 17" iMac defaults to a 1440 x 900 display, while my 12" PowerBook has a 1024 x 768 screen. Nicely, the Screen Sharing application scales the larger iMac display so that it all fits on my smaller PowerBook screen. Very nicely done. 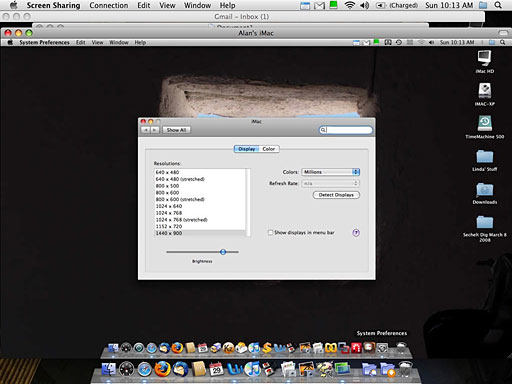 One thing to be aware of, though. My various computers at home are connected to a router and get their IP addresses via the default DHCP networking option; that means that their IP addresses are temporary, assigned by the router, and could change. In reality, I've found that the DHCP-generated IP addresses are pretty stable, but if you're unable to connect, you may need to walk over to the other computer and check its IP address. Perhaps easier than having to know the IP address of the remote computer on you local network: Once you've enabled screen sharing in this way, clicking on the computer in the Finder's sidebar, you'll now see an option to share its screen - just pick that (and optionally enter log in information), and away you go. Alternatively, clicking the Browse button in the Finder's Go/Connect to Server dialogue will take you to the same place. Either way, there's no typing IP addresses required. 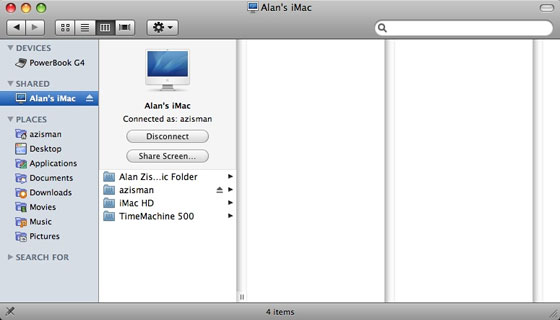 You may notice that my screen shot shows that when I'm connected, I'm running a program named Screen Sharing. You won't find a program with that name in your Mac's Applications or Applications/Utilities folders. Instead, it's cleverly buried away in the System/Library/CoreServices folder, along with the Finder application and a number of other basic Mac services. Really Remote: Connecting Across the Internet All this works fine as long as I'm connected to the same local area network as my not-very-remote other Mac. It's nice to be able to open an application on the other Mac without have to get out of my comfortable easy chair, but frankly, I probably could walk across the house without too much difficulty. More useful is the ability to contact my iMac from a real 'remote' location - from work, for example, or when traveling. That can be done, but it requires a bit more work. The thing is that those 192.168.xxx.xxx IP addresses are for local area networks; the designers of the Internet and TCP/IP networking set them (and several other blocks of addresses) aside for private local networking use, making them inaccessible across the Internet. This is a very good thing, allowing a computer on your home or office network and a computer on my home network to both have the same IP address without conflicting with one another. The router has an IP address that is connected to the rest of the world. All the computers (and other devices) connected to that router share that single connection. This minimizes the number of IP addresses in use - also a good thing, as IP addresses are in increasingly short supply. And having the router in between your computers and the Internet is also a good thing, providing a layer of protection - outsiders wanting to access your computer first have to get past the router and generally fail to do so. But you legitimately want to access your computer from outside. To do that, you need to modify your router's settings to allow for screen sharing. Most popular routers can be accessed using a web browser and pointing to the router's address on your network; you'll be asked for login information and then directed to a webpage built right into the router. (If you don't know the default IP address and the login information, check the documentation that came with your router, either in print or on a CD; if you've lost that, it's generally available online at your router manufacturer's website). Exact details of what to do next vary from router to router. Here's what works with my D-Link wireless router. On my router, going to http://192.168.0.1 gets the following log-in screen: 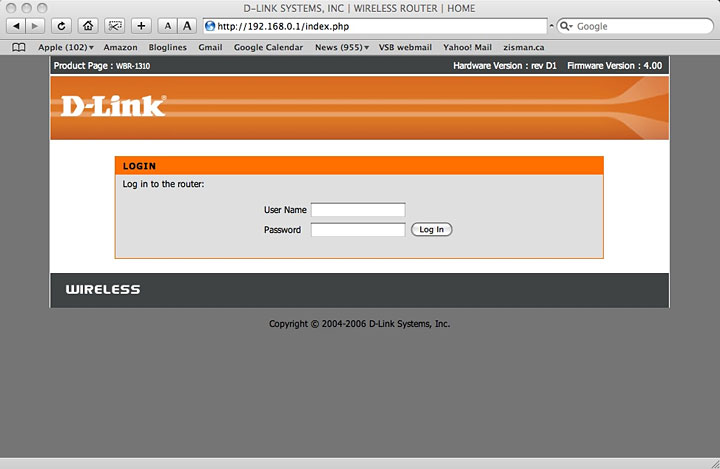 I've changed the default log-in password (and suggest you do the same!), though I kept the default user name of 'admin'. Once I'm logged in, there's a screen offering a Wizard or Manual Configuration. The Wizard won't give the advanced options I need; pick the Manual Configuration. 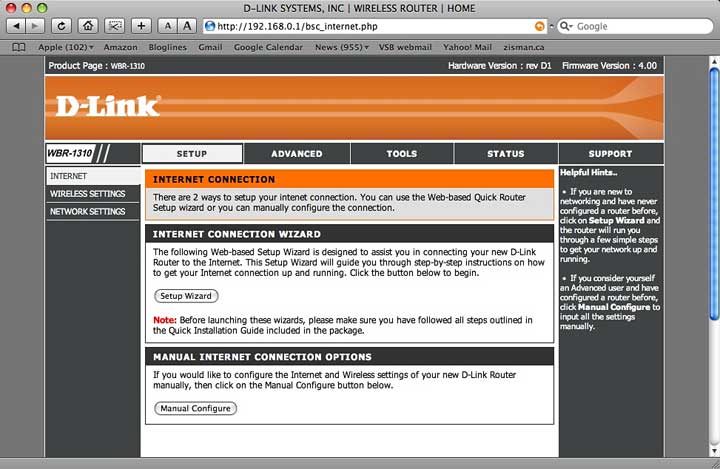 Even the initial Manual Configuration screen doesn't have what I want - port forwarding. Clicking the Advanced button along the top got me there: 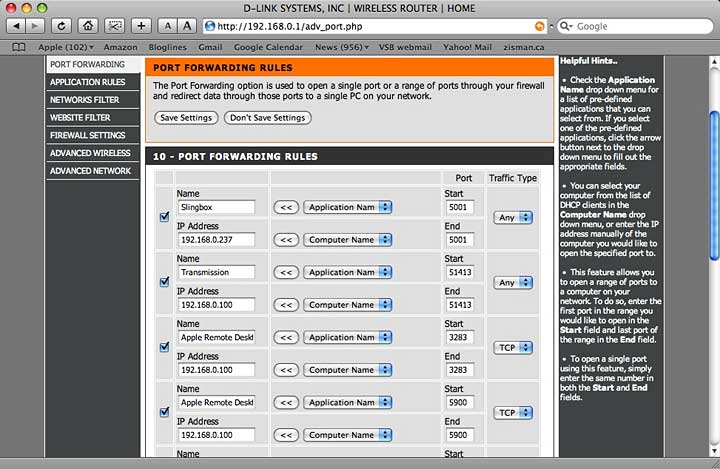 You may notice that I'd already set port forwarding to allow me to access my Slingbox device so that I can remotely view my cable TV. You probably don't have a Slingbox. To enable screen sharing, however, I've added port forwarding for two ports: 3283 and 5900, setting them to forward an application named Apple Remote Desktop (the name doesn't really matter - this is just a convenience for the user so they will know what it is when checking here later) to the IP address of my iMac - the computer whose screen I want to share. Note at the right-hand side of the window, there's a field for 'Traffic Type'; I've selected TCP. As well, further down, in a part of the window not visible in the screen shot, I've repeated those same ports application name, and IP address, this time setting Traffic Type to UDP. (There's also a potential setting of 'Any' - that might have let me avoid the duplication. Feel free to experiment.) After making those changes, I logged out, saving my changes. That should have applied the saved changes to my router, but just to be sure, I reset it by pulling out the power cable, plugging it back in, and waiting a few moments to let it reconnect to the Internet. Whew! But we're still not ready - we need to know what IP address your home network gets from your Internet Service Provider. That's the address you'll need to connect to in order to access your Mac's screen remotely. One way to find that out is to open your browser (assuming you're at home, within your network) and point to: www.whatismyip.com. That will quickly report the IP address you're using to connect. I couldn't use that IP to address to connect to my iMac from my PowerBook when both were connected to my home network. But when I took my PowerBook to work and typed that address in using the Finder's Go/Connect to Server menu, it worked just fine. It's a bit slower than connecting at home, but quite usable. I've tried it from other remote sites, and it's worked without problem. But it gets better. Windows, too, Can Share Your Mac's Screen At work, I've got a Windows XP system on my desk. Windows does not include VNC screen sharing as a built-in feature (though Microsoft includes its own proprietary screen sharing for remote access). But because VNC is an open-source protocol, there are a variety of utilities available for download and installation on Windows systems. I've got TightVNC installed - I use it in my school's computer lab to see what students are doing on their computers out of my sight, and to access my school's servers for administration. Typing my home network's IP address into TightVNC and entering my password opens my home iMac in a window on my XP system at work. It's got more configuration options to fiddle with, though the default settings worked okay for me. 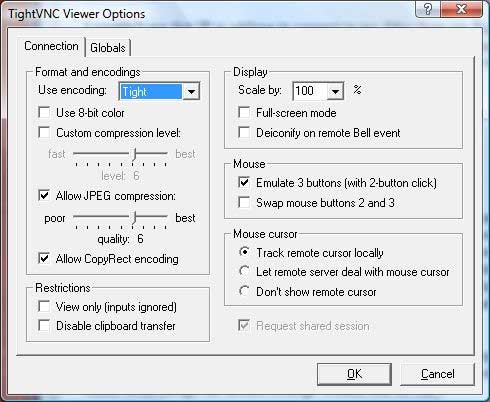 Screen updates are slower in my tests than Mac to Mac using Leopard's Screen Sharing - though it may be that fiddling with the TightVNC options could improve this. Nevertheless, it's usable and will prove to be useful from time to time. (Below you can see me starting to edit this article on my iMac - in a window on my Windows Vista laptop.) 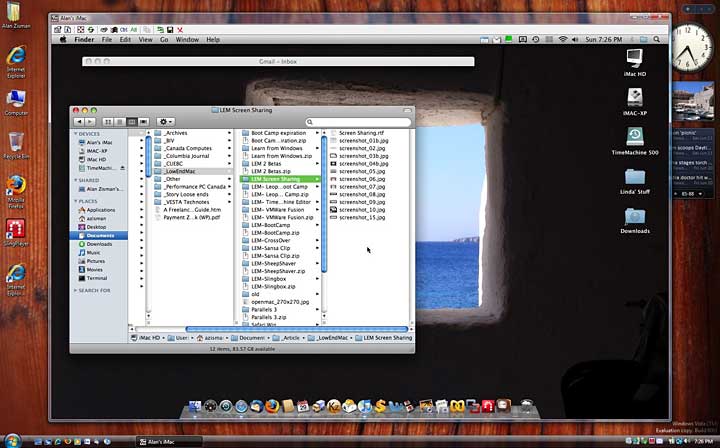 But How Can I Use This with My Mom? I can't imagine getting my mom to set up port forwarding on her router, even with me on the phone. I would need to have screen sharing up and running in order to try to do this for her. And since I want to be able to share screens with her in order to help with her computer, that's not going to be much help. But Apple has added another screen sharing feature to Leopard. This one isn't much use when I'm trying to get at my home computer from work, but it's pretty much perfect for using one Mac to share the screen of another Mac when both users are sitting at their Macs. It uses iChat. (And you thought that iChat was just for chat!) In order to make use of iChat screen sharing, a number of things need to be in place: Assuming all these are true, both users just need to open iChat. Either should start a chat with the other. At the bottom of the little window showing buddies there is a series of icons- for text chatting, audio chatting, video chatting, and last an icon with an overlapping pair of rectangles for screen sharing.  Clicking on it let's you choose to ask the person with whom you're chatting to either let you share his/her screen or to agree to share your screen. 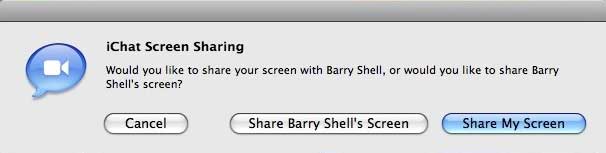 Pick one, and they'll see something like this:  Assuming the other person clicks on the message to agree to it, you'll see large text pop up on your screen noting that this person is now sharing your screen. (This disappeared too quickly for me to be able to capture the text.) If you're sharing another user's screen, you can will see their screen in a large window (and share control of their mouse and keyboard) and see your screen in a small window. Clicking in that small window brings it to the foreground, reducing their screen to the small window - and removing your control of their mouse and keyboard. 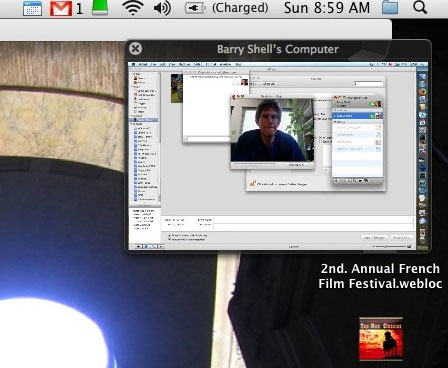 Either way, while you're sharing screens, you also have audio chat automatically enabled. If you're doing informal tech support, you can be explaining what you're doing while you work with the remote user's mouse and keyboard. Very nicely implemented, easy to get up and running, and easy to use. A good way for one Leopard user to be able to help another Leopard user remotely. |
|
Alan
Zisman is a Vancouver educator, writer, and computer
specialist. He
can be reached at E-mail
Alan
|
|
|
| |
