 |
| About Alan |
| Tutorials |
| Free files |
| Win9x FAQs |
| E-mail Alan |
| |
| Articles |
| BIV articles |
| Archive |
| Other articles |
| Archive |
| |
 |
|
|
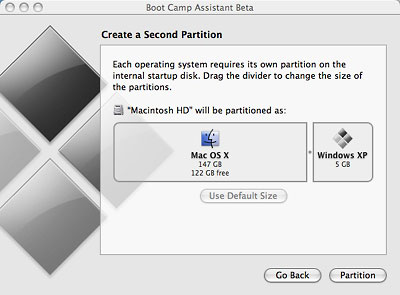
Not Perfect Yet, but Boot Camp Works as Advertisedby Alan Zisman (c) 2006 First published in Low End Mac April 19 2006, Mac2Windows columnOver the course of this year, we've seen how Apple's release of Intel-powered Macs raised expectations that Mac could be made to boot to PC operating systems like Windows or Linux along with Mac OS X. The ability to run PC operating systems on Macs appeals to two groups of people: hackers, who see it as a challenge, and Mac users who from time to time need to run a particular program, open a data file, or access a website that just won't work right using Mac software. Initial fantasies that Intel Macs could just load Windows (or Linux) and go were quickly dashed - the new Macs use a modern boot-scheme known as EFI, which is not directly compatible with the decades-old BIOS used on run-of-the-mill PCs. A contest was announced, offering a monetary prize that ended up around US$14,000 for being able to run Windows on an Intel Mac. The prize was claimed in mid-March, but - not surprisingly - the methods used were awkward, including destroying all the Mac's existing data in the process of creating a Windows partition. Within a few weeks, it got easier to run Windows on an Intel Mac. Much easier. First, Apple released beta software, Boot Camp, which makes it possible to set up an Intel Mac to dual-boot Mac OS X and Windows - much more easily than the prize-winning hack, and without destroying your existing Mac data. A few days later, a prerelease trial version of Parallels Workstation was released - software that enable Intel Macs to "virtualize" a wide range of PC operating systems, running them in a window on an OS X desktop. Because this doesn't require rebooting the Mac, it holds the potential of being more useful to many users. Thanks to Apple Canada, I was loaned an Intel-powered iMac for a few weeks in order to experiment with both Boot Camp and Parallels Workstation. This article is summarizing my Boot Camp experience. Look for a separate piece on Low End Mac focusing on Parallels Workstation tomorrow and a companion piece introducing Windows security issues for Mac users. Boot CampBoot Camp is officially beta software; it's supposed to be released as part of Apple's next-generation OS X 10.5 "Leopard" later this year. For prerelease Software, everything worked as advertised - at least for me.  Online, there are lots of reports from people who installed Boot Camp and were able to install Windows, but then not able to return to OS X. I suspect I know what they did wrong, but it's important to note that the current release is beta software; users need to be aware that it can be risky to use prerelease software and need to be aware that Apple doesn't offer any support. If you have critical data on the computer to which you're installing Boot Camp, make sure you back it up! (The Boot Camp beta is also time-limited, though I don't know what that will turn out to mean. I suppose it's possible that after a fixed period of time, your Windows partition will no longer be accessible or something. If you want to remove your Windows partition at any time, Boot Camp includes an uninstall feature that will restore your Mac's hard drive to a single OS X partition, removing all traces of its Windows double life.) There is at least one place where a wrong choice can be disastrous.Apple includes very explicit documentation about using Boot Camp, both online and with the Boot Camp download. Read it and follow directions carefully. There is at least one place where a wrong choice can be disastrous. RequirementsBefore you get started, you need to have an Intel-powered Mac, and you need to make sure the operating system is updated to (at least) OS X 10.4.6 and that the firmware is updated to the latest version. You may have just purchased that Intel-powered iMac, Mac mini, or MacBook Pro a month or two ago, but check for firmware updates anyway. (Go to www.apple.com, click on Support, click on Downloads, and search for your Mac model - for instance, search for "iMac Intel firmware"). On my loaner iMac, installing the firmware update took a bit more time than I expected. After downloading and running the software, a restart was needed . . . and I had to read the directions: Hold down the power key while the light blinked repeatedly before releasing it. Failing to read the instructions meant the Mac restarted without installing the update and gave me the dialogue box with the directions again until I eventually got it right. The Boot Camp software won't run unless you've upgraded to OS X 10.4.6; I don't know what will happen if you try it without the latest firmware - that may be one of the reasons some people have experienced problems. PartitioningAfter downloading the 83 MB Boot Camp file, if you're up to date you can run it. It installs into the Intel Mac's Applications/Utilities folder. Running it burns a CD with Windows drivers specific to your Mac model and then offers to repartition your Mac hard drive. There's good news - but for some users, perhaps some bad news.
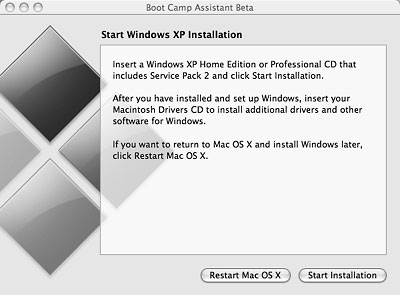
The partitioning is nondestructive; assuming you've got enough room on your Mac's hard drive, it will make a Windows partition without affecting your existing software and data files. The default is a 5 GB Windows partition; this is probably too small - a default XP SP2 installation fills about 4 GB, for instance, but it's easy to drag the dividing line on the graphic to create a larger Windows partition. I chose a 30 GB partition size. (We'll see that 32 GB is a magic number in a moment). it can't be used if you've already partitioned your internal hard drive.The partitioning utility only works on your primary internal Macintosh hard drive; don't even think of using it with an external hard drive or a second internal hard drive. And it can't be used if you've already partitioned your internal hard drive. Don't even think of booting to your OS X CD and using Apple's Disk Utility to create a Windows partition on your hard drive. Installing WindowsAfter creating a Windows partition, Boot Camp prompts you to insert a Windows XP CD and restart the computer to install Windows. (Alternatively, you can choose to do that step later.) It will only work with a Windows XP Service Pack 2 CD (Home or Professional), and it's got to be an original install CD, not an update CD. No multi-disk home made CD sets allowed. No original, pre-SP 2 CDs.
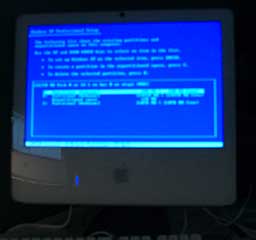
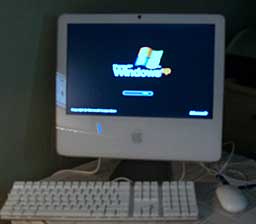
Update CDs won't work because they require the user to insert a CD from an earlier Windows version, and there's no way to eject the Install CD in the middle of the installation on your Mac. (Unlike most PCs, there's no eject button on the Mac's CD drive.) Because of Microsoft's Product Activation, if you "borrow" someone else's Windows XP CD, you're asking for trouble. The installation will probably work, but if you're unable to activate it, it will stop working after 30 days). Assuming you're able to insert a valid Windows XP Service Pack 2 installation CD, when your computer starts up, it boots right to the XP installation - a primitive-looking blue, text-mode screen. Several minutes later, you're faced with the critical choice. Windows Setup detects that there are multiple partitions on your hard drive and asks you to choose which one to use to install XP. There is only one right answer - you have to pick the one labeled "C:". Failure to pick this one will "nuke" your OS X installation. This is clearly spelled out in the Boot Camp documentation, but I suspect that many of the people complaining online about installation failures somehow missed this step and overwrote their OS X installation with Windows.
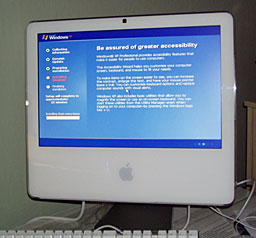
Next, you're asked to pick a file system; the choices are FAT and NTFS. NTFS offers more advanced features, while FAT offers backwards compatibility. Mac OS X can read FAT-formatted drives, so if you pick that, your Windows partition will show up on your Mac desktop, allowing you to read and write to it. If you want to share files between the two operating systems this may be a big plus. The XP Setup Software will only work with FAT partitions up to 32 GB in size; larger partitions have to be set up as NTFS, making them unreadable by OS X. After those choices, installation continues pretty much automatically. On my loaner iMac, it took about 45 minutes, though I've heard of some installation taking 90 minutes or so. Fairly quickly, it moves from the blue text-based screen to a more graphical display, including mouse support.
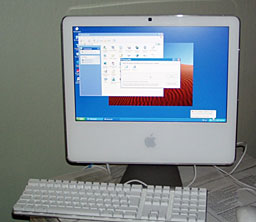
Up and Running with Windows XPNear the end, rather that rebooting as I expected, it shut down. After restarting, like a Mac installation, it asked for user input, requiring a user name and password, and asking some questions about how you expect to connect to the Internet. After that, I was finally up and running in Windows XP.
At that point, the Mac was still not quite ready to go. Microsoft's generic installer doesn't know about the hardware that Apple included with your Mac; you've got a generic display and no support for the network adapter, WiFi adapter, Bluetooth, or sound card. Time to insert the driver CD that Boot Camp made. The CD should start up automatically (it did for me) and install the proper drivers for the hardware on your Mac - or at least most of it. Unsupported HardwareThere's currently no support for the iSight camera built-into Intel iMacs and Mac Book Pros, for instance. And you won't be able to use the MacBook Pro's ambient light sensor and hard drive motion sensor, the Apple Remote Control, or Apple's optional USB modem. The MacBook Pro's trackpad support is also lacking; it falls back to Microsoft' generic touchpad driver. No two-finger scrolling and no Ctrl-click for right-click. MacBook users should probably plug in a (two-button) mouse.
As well, the system clock will be four hours ahead of the correct time. (You may want to download third-party software to connect to an Internet timeserver at every reboot. Otherwise the error will reoccur every time you restart even if you manually correct the time.) Hopefully Apple will provide support for these various (relatively minor) hardware issues soon. Additional Features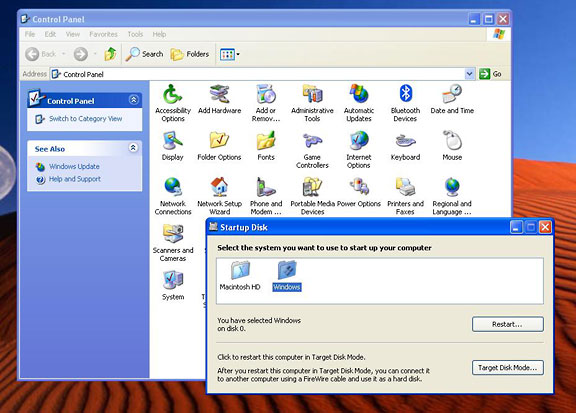
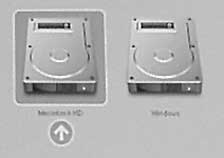
There are a couple of nice additional features installed by Apple's CD: a screen brightness icon appears in the Windows system tray, and there's a new Startup Disk icon in the Windows Control Panel. As with the similar item in the Mac OS X System Preferences, it can be used to choose to boot to either Windows or OS X. If you don't use the Startup Disk item, you can still boot to your chose operating system at any startup: hold down the Option (Alt) key after you hear the boot chime tone. Within a few seconds, you'll see two hard drive icons, one labeled OS X, the other labeled Windows. Move between them using the arrow keys, and press enter to select an operating system.
In the End, it's WindowsOnce you're up and running, Windows XP on your Mac is, well, Windows. Despite the minor hardware issues I've outlined, my test iMac made a fast Windows system. It connected to my home network and to the Internet without problem, and it booted quickly. Windows software installed and ran. The Windows version of Photoshop is noticeably quicker than the (non-Intel-native) Mac version on the same program. If you're a Mac user who sometimes needs access to a Windows computer, this could be the way to go. On the other hand, all the Windows issues with viruses, spyware, and the like are as much the case on this system as on any other Windows PCs. (More of that in Windows Security for Mac Users.) No Luck with LinuxNever content, my next experiment was to see if, with my iMac booted to Windows, I could coax it to boot to a Linux CD, partition the Windows partition to make room for Linux, and install that operating system. I couldn't make that happen. But as I was writing this piece, an article describing a somewhat complex method for triple booting via Boot Camp appeared on Wikipedia.
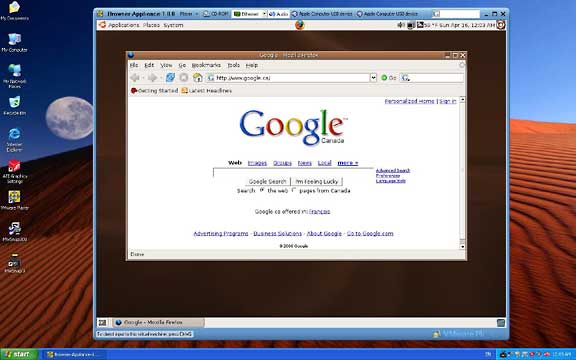
While using Boot Camp to install Windows XP is pretty straightforward, this triple booting appears to be more for the pioneers. Instead, I've downloaded the free VMware Player and am using it to run Linux in a window on my Windows XP desktop on a Mac. That's more than enough multiple operating systems for
me - at
least for now. |
|
|
|
|
| Alan Zisman is a Vancouver educator, writer, and computer specialist. He can be reached at E-mail Alan |